
Wednesday, November 2, 2011
TrueLove for TrueCut
Monday, October 31, 2011
Lil Twister


1. Lay out 5"x5" squares in any pattern you wish. I used 42 charms and the layout was 7 across and 6 down. Try to have lots of contrast to show the effect well.
2. Sew charms in row using a 1/4" seam and sew the rows together after 'butting the seams together' and pinning carefully.
3. Cut 3" strips from the border material in this case another Rylie Blake fabric and sew to each side using a 1/4" seam as before.
4. Now comes the fun part. Take the tool and line up the horizontal and vertical lines at each junction starting the first one where the left top and side border meet the charm squares. Very carefully cut around the tool. I found using a small rotary cutter worked well. Work across the first row and keep each piece in order. You can sew them together as you go. Once the first row has been cut, drop down to the second row at the left and repeat the process. Continue untill all rows have been cut apart and resewn. Then join the rows together and reveal the design.
5. Your top is done UNLESS you want to use the 2" squares which are left over after each cut, which I decided to do. I used my GO Cutter to even up the squares and sewed them together and attached them to the sides, top and bottom. You may want to trim them down, attach to 2 sides only, save them for another project or discard them (don't do that - send them to me!).
I enjoyed making this but it does waste fabric and your project while interesting, does shrink quite a bit so you decide.

Have a great week and Happy Hallowe'en!
Monday, October 17, 2011
New Give Away From Melissa

As for me, had a garage sale this past week-end which was a lot of work and only brought in $200. We were amazed at how little people would pay for some really good stuff. I knew things had to be priced low but really......... Still have lots of 'junk' left (nothing quilty) and will think about having another one or giving to charity as we usually do.
On the sewing front I have made my daughter a pillowcase:

I have had some good luck collecting cottons at second hand stores in the area and would love to share the photos with you.


 | ||||
| Sophie wants something! |
Friday, October 7, 2011
Intrepid Threads Giveaway

Sunday, September 25, 2011
It's Not That I Don't Want to be Quilting BUT.........
My sewing room beckons me but there are so many other things that need doing and now this is one of the things in the way -
 Yup, new homes need landscaping and we want to start on the front this fall. We found a small nursery in Chemainus, Sandpiper Garden and Glass and it is quaint and wonderful. They want to remodel so lots of sales and we bought some of the bigger items which are standing in tubs in the view above.Oh, dear, doesn't look like much when placed in the yard. Here's a photo of Sandpiper Garden and Glass.
 It's owned and operated by people we knew when we lived in Mill Bay which is part of the "south end of the Cowichan Valley". Was great to see Gunnel and know her expertise is there for us. I was thrilled with my purchases and now have my first flowers planted.
 And the plan is that I will be able to change the groupings with the season! I know this is not a new concept but had fun putting this together - and I think it adds a simple yet inviting touch. So the front entrance has some charm. I have several more ideas but they will have to wait for now.


That was yesterday and today I went shopping, bought this -

to turn it/them into -

Spicy Yam and Red Pepper Soup
It will be served with Black Bean veggie patties. Hope everyone had a nice week-end and let's keep smiling!
Thursday, September 8, 2011
AccuQuilt Flower Die
Here is another look at the Die I bought in Kelowna. I am such a novice in all of this but here goes.
 | |||
   What do you think and what would you do with this Die? Inquiring minds want to know. |
Wednesday, September 7, 2011
What a Wonderful World!

 |
| kelp that was rooted in rocks |
This was our 3 day Labor Day week-end in Canada, the last hurrah before school is back in session and it marks the end of summer. Although the weather can remain warm for weeks yet, the evenings and early mornings are cooler and signs of fall are just around the corner. It's an amazing time of year and my favorite.
Thursday, September 1, 2011
Sew Tuff Tofino BC
http://www.sewtuffquiltingco.com/Site/Welcome.html

I found this little shop in Tofino last time we went to the west coast and had a chance to revisit it last week-end.

Strutting his stuff inside was this little guy.
 His name is Winston and he's bigger than this now as he's 5 months old but he is still pretty little. He's a mini pig and won't get very big but he's teething now and he wanted to chew on my runners!
This shop is WONDERFUL - the owner is in her early 30's and just buys what she likes. And though I'm not in my 30's (haha) I found a lot to like and settled on these fabrics (had to buy after I drooled on them)
 Do you like? I sure do. I'm hoping to make a baby quilt and think I can fussy cut 15 birds out. Tried to start cutting today but you know, I just couldn't do it - worried about making a mistake. Please wish me luck.
Anyway this shop is really refreshing and I plan on getting to know it, the owner and Winston very well over the next few years. Her website is easy to navigate and she welcomes online orders and has her fabric online for you to see. If you take a look let me know what you think.

I found this little shop in Tofino last time we went to the west coast and had a chance to revisit it last week-end.

Strutting his stuff inside was this little guy.

This shop is WONDERFUL - the owner is in her early 30's and just buys what she likes. And though I'm not in my 30's (haha) I found a lot to like and settled on these fabrics (had to buy after I drooled on them)

Anyway this shop is really refreshing and I plan on getting to know it, the owner and Winston very well over the next few years. Her website is easy to navigate and she welcomes online orders and has her fabric online for you to see. If you take a look let me know what you think.
Wednesday, August 24, 2011
First Rug Mats


http://sew-fantastic.blogspot.com/2011/03/mug-rug-tutorial-scrappy-colorblock.html
The binding hasn't been sewn on either of them but gives you an idea of what I was doing.
Kelowna was hot as was expected and the wedding was very nice. I arrived the day before and helped prepare supper for 23 and then relaxed and visited for the next 4 days - great time.
On my way to the airport prior to the flight home, Mary stopped at Linda's Quilt Shoppe, a serious generous sized quilt shop in Kelowna - lots of eye candy here - fabric, kits, classes, tools and thread. I didn't have my camera with me but she does have a web site so you can browse a bit. I did indulge in a new die for my GO Cutting machine.

Thursday, August 11, 2011
Give Away at Woolie Mammoth
Good morning. Just want to let you know that Anna over at Woolie Mammoth is looking for more followers sooooo.. she has put together a kit using coffee prints for a give-away which I think is very generous. http://wooliemammoth.blogspot.com/
If the link doesn't work you can find her under my blog list, right side of the page. I want to wish you luck but I really want to win myself - how selfish right!?
I haven't done much sewing this summer but have some ideas and plans for this fall. Have put a couple of blocks together for my first sew along and it has been great fun - don't know what I'm making yet but will show you (if anyone is still reading my blog after my long absense) soon. Am out for lunch today and having people over for supper tonight so today is a social day. Yeah.
Thursday, July 14, 2011
Quilt Along Virgin
I am joining my first quilt along!
 AMANDA JEAN of Crazy Mom Quilts is starting one I might be able to handle. I have to look at my stash if I can find it and pick out at least 24 1/8s. I'll have two per 12" block and 24 blocks would be for a baby quilt. Or I can make a bigger one. Amanda Jean has done all the math. This is exciting.
http://crazymomquilts.blogspot.com/
Here's a few photos of my sewing stuff and room. See what I need to do
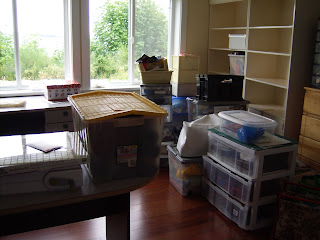


 Guess who's got work to do!?
http://crazymomquilts.blogspot.com/
Here's a few photos of my sewing stuff and room. See what I need to do


Wednesday, July 13, 2011
Inch Worm wants to Hear from You!
Jeanette over at Inch Worm Fabrics is hosting a give-away and will 'draw' a winner once 200 quilters have commented. Let's help her get there. I'm having trouble linking to her blog but the address is: http://inchwormfabrics.blogspot./com.
Saturday, July 9, 2011
Some of My Views
Good morning. It's almost 10 am and I am still in my dressing gown thoroughly enjoying the morning, listening to Luke Parkin on the piano, drinking coffee and taking photos of my vista. Thought I would share a few with you since quilting doesn't appear to be in my near future. This is the view from my bed - I know! Hard to take eh?
 And here is one of the views from my beautiful kitchen!
That's Salt Spring Island across from us.
 Sitting on my deck I had company for breakfast. He wanted a quiet moment to himself which hey, we can understand so I left him(?)to dine alone.
 That is our neighbors yard he is heading for. Plantings need to be carefully chosen to survive in Crofton.
Here's the last one for today - the mill, ferry from Salt Spring Island unloading and the edge of Crofton's RV Park. Crofton has a deep sea port so we get to watch freighters swing by, tugs towing barges and much more.
 Must send this now and get on with my day. Hope yours is the best. hugs.

That's Salt Spring Island across from us.


Here's the last one for today - the mill, ferry from Salt Spring Island unloading and the edge of Crofton's RV Park. Crofton has a deep sea port so we get to watch freighters swing by, tugs towing barges and much more.

Monday, July 4, 2011
WHO GETS THE BABY?

True Random Number Generator
Min: 1
Max: 301
Result:
102
And 102 is WENDY who asked for: circles, 6 1/4 apple core, 5" squares DIE.
Accuquilt will be sending her a new BABY GO CUTTER AND THE DIES! I can feel her excitement and how great it is to win. CONGRATULATION WENDY!
And I also know how disappointing it is not to win but it is fun for awhile as we think of the possibility and we do know if we don't play we can't win. Thank you everyone. This was a blast and may an ACCUQUILT CUTTER and ALL OF THE DIES be in your future soon.
The sun shines here and it is going to be a great week. Make sure yours is too.
Sunday, July 3, 2011
LAST DAY FOR MY GIVE AWAY AND ANOTHER GIVE AWAY
Well this has been fun and I've met some great people. Thank you to all of you who have stayed to 'follow'. Tomorrow morning I will be drawing winner and also getting on with 'the move'. I've had 4 days off from the drudgery of moving and cleaning while my son and his family have visited but they leave today and I need to get back to it. My sewing room is not going to be set up for awhile, so sad and one of the reasons I was reluctant to move. A friend commented on what a great opportunity this to sort and organize and she is right it is so I will soldier on.
For those who have the fortitude to try for another BABY GO Kathy is also giving one away at "Quilting along
the Gorge" and that give away is open until July 8 or 9.
For those who have the fortitude to try for another BABY GO Kathy is also giving one away at "Quilting along

the Gorge" and that give away is open until July 8 or 9.
Saturday, July 2, 2011
ANOTHER GREAT GIVE AWAY!

http://joyofquilting-natasha.blogspot.com/2011/06/oh-my-goodness-i-have-awesome-giveaway.html Good luck!
Monday, June 27, 2011
Baby Go or Studio Fabric Cutters and their Dies SPECIALS from Accuquilt
If you've been trying to win a BABY GO and can't wait anymore here's your chance for some great specials from Accuquilt!
GO! 4 It Die Sale - information here:
http://www.accuquilt.com/go-shop/sale.html
Free Alex Anderson Die Set - information here:
http://www.accuquilt.com/go-shop/go-portable-fabric-cutters/go-baby-fabric-cutter-gift-with-purchase.html
Studio Fabric Cutter $395 - REALLY good price - information here:
http://www.accuquilt.com/studio-shop/studio-fabric-cutter/studio-fabric-cutter.html
Studio Die SaleBuy 4 or More and Save 25% - information here:
http://www.accuquilt.com/studio-shop/dies.html
Still moving! - Gosh it's fun - haha. My husband is so...... tired. Think we have way too much stuff!!! Except for my sewing 'treasures' of course. Hope everyone had a good day.
Sunday, June 26, 2011
Movin, Movin, Movin
I wanted to respond to each one of you and give a special thanks to those of you who are following and first day I was able to but today we started the move to Crofton and I am exhausted -lol. Wow, do I have a lot of stuff! So if you don't hear from me please understand and once again good luck to all.
Friday, June 24, 2011
Anonymous responders please read!!! for ACCUQUILT GIVEAWAY
Several of you are anonymous responders and we can't get back to you. SewCalGal has great tips for bloggers and non-bloggers at the following site. You need to scroll down page until you come to heading TIPS.... I know this can be frustrating as I am quite new to this as well. Good luck!!!
http://sewcalgal.blogspot.com/p/giveaways.html
http://sewcalgal.blogspot.com/p/giveaways.html
Thursday, June 23, 2011
READY! SET! GO BABY CONTEST STARTS NOW

I get to give an AccuQuilt Baby Go and 3 Die away!!!!! I am pumped and hope you are too.
To choose your Die check out Accuquilt or click on the following:
This is honestly the hardest part as there are 58 to choose from and you are going to want them all.
Here are the rules:
1. Leave a comment here (at the end of this post) with your 3 choices of Go! Cutter dies.
1. Leave a comment here (at the end of this post) with your 3 choices of Go! Cutter dies.
2. Become a follower or comment that you already are a follower for another chance.
3. Post about this giveaway for yet another chance.
Only comments on this post will be included in the giveaway so please do not leave a comment on the Accuquilt Facebook page. That's it. Quite easy, huh? If you are lucky enough to be the winner, please make sure that I have a way to contact you. If you are a No-reply blogger, I will have to pick another winner.
The giveaway will close Sunday night, July 3, 2011. I will announce the winner on Monday, July 4, 2011.
Good Luck to each of you.
Wednesday, June 22, 2011
Accuquilt GO Basket Die Instructions

I'm attempting to do a step-by-step demonstration for the first time so please bear with me.
The instructions are free from Accuquilt. Go to Alex Anderson's Basket Quilt pattern and download. need to sign in and choose 'Add to Cart' but the pattern is free. http://www.accuquilt.com/patterns/go-free-patterns.html?p=

I printed the instructions and used them to make the block. First I chose 2 fabrics and cut 2- 5 1/4" by 11 1/2" rectangles out of each, stacked and cut the rectangles and took the die packaging and the instructions to my sewing table.

Sewing Directions
1. Press one, 1" Fabric #1 bias strip in 1/2 lengthwise, wrong sides together, to make a handle.
2. Stay-stitch long edge of one Fabric #2, 3" Half-Square Triangle.
3. Trace handle placement guide (see below)


Using the same basket and background fabrics, pin and sew one Fabric #1, 1 1/2" Finished Half Square Triangle and one Fabric #2, 2" square together as shown. Press seams towards squares.
Pin and sew each unit to basket unit pressing seams away from basket unit.
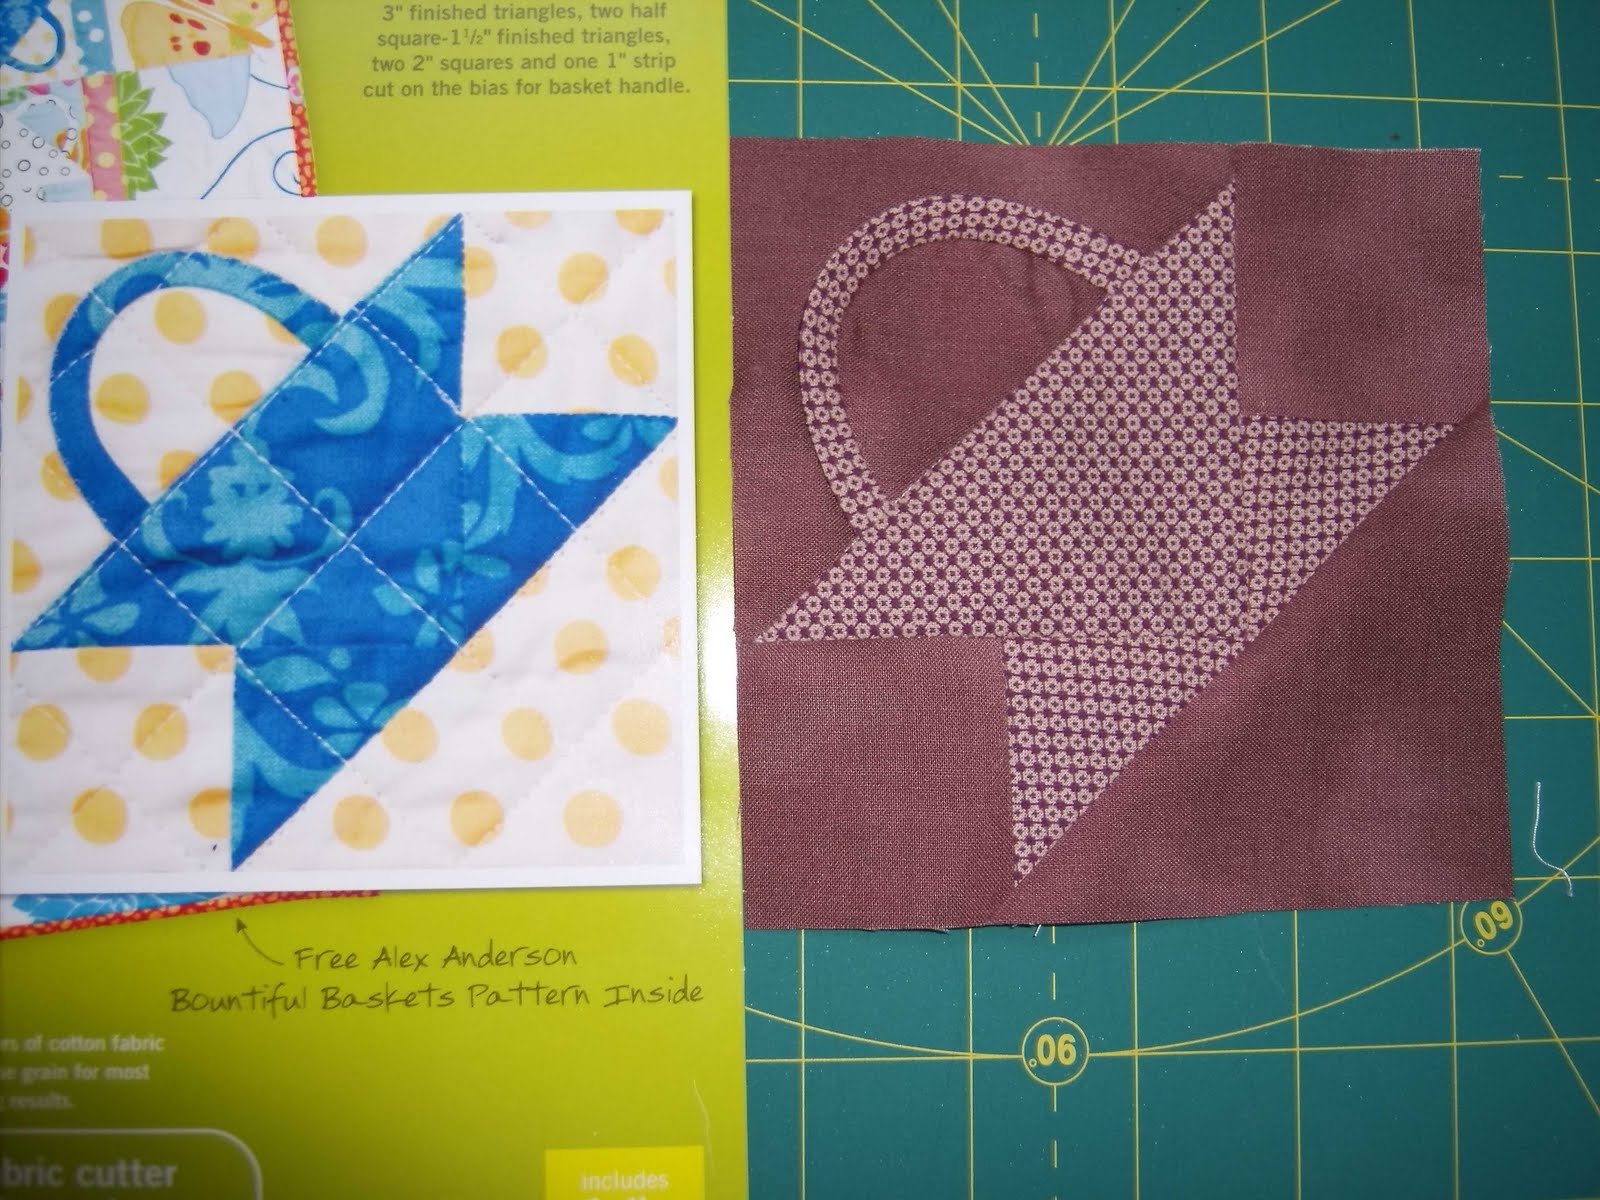
And here is mine, finished.
You will be able to make 3 more basket units if you cut 4 layers. I am new to quilting and yet I found this went together very easily. I have learnt to make sure my 1/4" seam is a true 1/4" though. That seems to be very important.
Subscribe to:
Posts (Atom)